

Painting your ceiling can be a rewarding home improvement project that can instantly refresh and elevate the look of a room. Whether you’re a seasoned DIY enthusiast or a novice painter, following these detailed steps will help you achieve a professional finish and transform your space.
Table of Contents
Preparation is Key
Before diving into painting your ceiling, taking the time to prepare the room and the surface will set the stage for a successful project. Here’s a breakdown of essential preparation steps:
- Clear the Room: Remove all furniture, decorations, and other items from the room. If moving everything out is not possible, cover them with drop cloths to protect them from paint splatter.
- Clean the Ceiling: Dust and clean the ceiling surface thoroughly to remove any dirt, grime, or cobwebs. A clean surface will ensure better adhesion of the paint.
- Use Painter’s Tape: Apply painter’s tape along the edges where the ceiling meets the walls. This step will create clean, sharp lines and prevent paint from bleeding onto the walls.
Priming for Success
Priming the ceiling is a crucial step, especially if you’re dealing with stains, discoloration, or different surface materials. Here’s what you need to know about priming:
- Stain-Blocking Primer: Use a high-quality stain-blocking primer to cover any stains on the ceiling before applying paint. This primer will prevent stains from bleeding through the new paint and ensure a uniform finish.
Tools and Materials You’ll Need
Having the right tools and materials at your disposal can make the painting process smoother and more efficient. Here’s a list of essential items to have on hand:
- Ladder: Choose a sturdy ladder that provides safe access to the ceiling without wobbling or tipping.
- Extension Pole: An extension pole will allow you to reach high ceilings comfortably without the need for constant repositioning.
- Quality Brush and Roller Cover: Invest in a high-quality brush and roller cover to achieve a smooth and even application of paint on the ceiling.
Mastering the Painting Technique
Now that you’re prepared and equipped with the necessary tools, it’s time to focus on the painting technique. Follow these steps for a flawless finish:
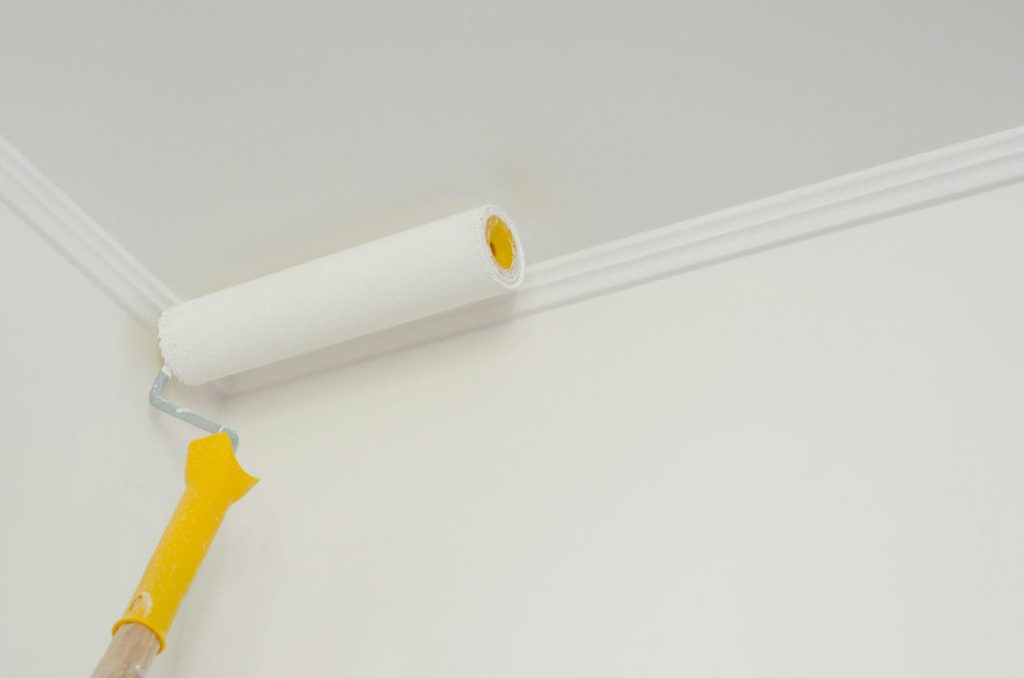
- Cutting In: Begin by cutting in around the edges of the ceiling using a brush. Paint along the taped-off areas where the ceiling meets the walls to create clean lines and avoid overlapping onto the walls.
- Rolling the Ceiling: Use a roller to apply paint to the rest of the ceiling. Start from one corner and work your way across in a straight line, slightly overlapping each stroke for even coverage.
- Applying a Second Coat: If the first coat of paint doesn’t provide sufficient coverage or if you desire a deeper color, apply a second coat in a perpendicular direction to the first coat. This will ensure a uniform finish.
Finishing Touches
As you near the completion of your painting project, pay attention to these final touches to ensure a polished result:
- Remove Painter’s Tape: Carefully peel off the painter’s tape while the paint is still wet to reveal clean, sharp lines where the ceiling meets the walls.
- Replace Fixtures: Once the paint is dry, reattach any light fixtures, ceiling vents, or other accessories that were removed before painting.
- Clean Up: Wash your brushes, rollers, and other tools with warm, soapy water to remove paint residue and keep them in good condition for future projects.
By following these detailed steps and techniques, you can paint your ceiling like a pro and achieve a professional-looking finish that will enhance the overall aesthetics of your space. Remember, thorough preparation, the right tools, and attention to detail are key to a successful ceiling painting project.
Paint Your Ceiling with Painters Milwaukee Pro
Experience the expertise of Painters Milwaukee Pro for residential interior painting and commercial interior painting projects. Trust in their professional team to elevate your space with precision and quality. Whether it’s a residential renovation or a commercial upgrade, Paitners Milwaukee Pro delivers exceptional results. Transform your ceilings with a touch of excellence and let Painters Milwaukee Pro bring your vision to life.
FAQs
Q: Do I need to prime my ceiling before painting?
A: Priming your ceiling is highly recommended, especially if you’re dealing with stains, discoloration, or different surface materials. Using a stain-blocking primer can help prevent stains from bleeding through the new paint and ensure a uniform finish.
Q: What type of paint should I use for my ceiling?
A: Opt for a high-quality ceiling paint that is specifically formulated for ceilings. These paints are designed to minimize splatter, offer better coverage, and resist yellowing over time. Matte or flat finishes are commonly used for ceilings to hide imperfections.
Q: How do I prevent paint splatter on walls when painting the ceiling?
A: To prevent paint splatter on walls, use painter’s tape to mask off the edges where the ceiling meets the walls. Additionally, using a high-quality brush and roller cover, as well as maintaining a steady hand while painting, can help minimize splatter.
Q: Should I paint the ceiling before or after the walls?
A: It is generally recommended to paint the ceiling before the walls. This sequence allows you to paint the ceiling without worrying about drips or splatter on freshly painted walls. However, if you’re doing a full room makeover, painting the walls first can be more efficient.
Q: How many coats of paint are needed for a ceiling?
A: The number of coats of paint needed for a ceiling can vary depending on the color and quality of the paint, as well as the condition of the ceiling. In most cases, two coats of paint are sufficient to achieve a uniform and durable finish.
Q: Can I paint a textured ceiling?
A: Yes, you can paint a textured ceiling. When painting a textured ceiling, use a thick-nap roller cover to ensure even coverage over the textured surface. It may require more paint and effort compared to painting a smooth ceiling.
Q: How long does it take for ceiling paint to dry?
A: The drying time for ceiling paint can vary depending on factors such as humidity, ventilation, and the type of paint used. In general, most ceiling paints dry to the touch within 1-2 hours and can be recoated after 4 hours. However, full curing may take up to 2 weeks.
Q: How do I fix mistakes or drips while painting the ceiling?
A: To fix mistakes or drips while painting the ceiling, wait for the paint to dry completely, then lightly sand the affected area with fine-grit sandpaper. Once smooth, touch up the area with additional paint to blend it seamlessly with the rest of the ceiling.


